A reef sump adds water volume, hides equipment, and improves stability. A good sump setup also makes maintenance easier. If you plan the chambers well, your system will run cleaner, quieter, and more consistently.
Many reef keepers see a sump as complicated. It does not have to be. Once you understand the basic layout, it becomes one of the most useful parts of the aquarium. In this guide, you will learn what a sump does, how to choose the right size, how to arrange each section, and how to avoid common mistakes. We will also cover plumbing, return pumps, skimmers, refugiums, and simple troubleshooting tips. Whether you are setting up your first reef tank or refreshing an older system, these sump setup basics will help you build a practical and reliable filtration system.
Quick Reference Table
| Component | Purpose | Basic Tip |
|---|---|---|
| Drain chamber | Receives water from display | Use a filter sock or roller mat |
| Protein skimmer section | Removes waste before breakdown | Keep water depth stable |
| Refugium | Grows macroalgae and pods | Use moderate flow and simple lighting |
| Baffles | Control water level and bubbles | Space them evenly |
| Return section | Holds return pump and ATO sensor | This is where evaporation shows |
| Auto top off | Replaces evaporated water | Strongly recommended |
| Return pump | Sends water back to tank | Aim for practical flow, not maximum flow |
What a Sump Does
A sump is a second tank below the display. Water drains down into it, passes through equipment, and returns to the main aquarium. This design gives you more total water volume. More water means better stability. Temperature changes slow down. Nutrient swings become less severe. Dosing mistakes also become less dramatic.
A sump also keeps equipment out of sight. Heaters, probes, skimmers, and media reactors can stay below the display. That gives your reef a cleaner look. It also frees up space in the main tank for rockwork and coral placement.
Another major benefit is gas exchange. Water moving through an overflow and sump picks up oxygen. That helps fish and beneficial bacteria. In many systems, a sump also improves mechanical and biological filtration. You can run filter socks, roller mats, skimmers, refugiums, carbon, and phosphate media in one organized place. If you want to learn more about nutrient control, see: reef tank filtration guide.
Choosing the Right Sump Size
Bigger is usually better. A larger sump holds more water and gives you more room for equipment. It also handles drain-down better during power outages. That said, the sump must fit your stand and allow room for maintenance. Always measure the inside of the cabinet before buying anything.
For many reef tanks, a sump that holds 20 to 40 percent of display volume works well. A 75-gallon reef often pairs nicely with a 20 to 30-gallon sump. A 120-gallon reef may use a 30 to 50-gallon sump. These are not strict rules. The best choice depends on your skimmer, plumbing, and stand space.
Do not fill the sump to the top. Leave empty space for backflow when the return pump stops. Test this before the tank goes live. Shut off the pump and watch the water rise. If the sump gets too close to overflowing, lower the normal operating level. This one test prevents many disasters.
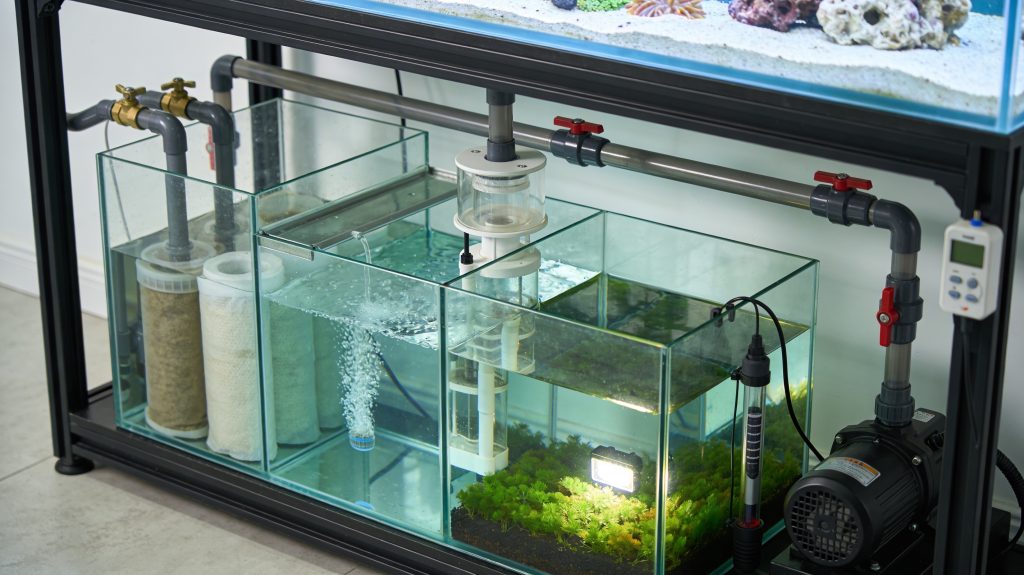
Basic Sump Layout
Most reef sumps use three main areas. The first is the drain or intake section. This is where water enters from the display. Many hobbyists place filter socks or a roller mat here. This catches detritus early and keeps the sump cleaner. It is also a common place for the protein skimmer.
The middle section is often a refugium or open equipment chamber. A refugium can hold macroalgae, live rock rubble, and copepods. Some reef keepers skip it and use the space for reactors or extra equipment. Both choices can work well.
The last section is the return chamber. This holds the return pump. It is also where evaporation becomes visible. As water evaporates from the system, the return section drops first. That is why the auto top off sensor usually goes here. Baffles between sections help control water level and reduce microbubbles. If you are planning your full system, see: reef tank setup checklist.
Step-by-Step Sump Setup
Start by placing the sump on a level surface inside the stand. Make sure you can remove the skimmer cup easily. Check access for filter socks, pumps, and cords. Tight spaces create long-term frustration.
Next, install the plumbing. Connect the overflow drain lines to the intake section. Add unions where possible. Unions make future maintenance much easier. Install the return line from the pump back to the display. A gate valve can help fine-tune certain drain systems. Do not rely on a check valve alone for flood prevention.
Place equipment in its chamber. The skimmer should sit in stable water depth. Follow the manufacturer’s recommended depth. Put the heater in an area with consistent flow. Position probes where water movement is steady. Add the auto top off sensor in the return section.
Fill the system with freshwater for a leak test. Run the pump and check all fittings. Shut the pump off and confirm the sump can hold drain-down water. Once everything is safe, drain it and refill with saltwater. This simple test can save your floor, your stand, and your peace of mind.
Plumbing and Overflow Basics
Your overflow moves water from the display to the sump. Your return pump sends it back. This loop must stay balanced. Most reef-ready tanks use one of three common drain styles. These are Durso, Herbie, and Bean Animal. Herbie and Bean Animal systems are often quieter and safer because they use multiple drains.
Use plumbing that matches the tank and pump requirements. Oversized plumbing often reduces noise and restriction. Flexible tubing can reduce vibration. Hard plumbing looks neat and stays secure. Many hobbyists use a mix of both.
Keep the plumbing simple when possible. Every extra elbow reduces flow. Every extra fitting adds another potential leak point. Add unions near the return pump and bulkheads. You will appreciate them later. If your overflow gurgles, the issue is often trapped air, poor adjustment, or too much flow through the sump.
Return Pump, Flow, and Turnover
Many beginners choose a return pump that is too strong. More flow through the sump is not always better. In most reef tanks, a turnover of about 3 to 5 times display volume per hour works well. Internal powerheads handle most in-tank coral flow. The sump only needs enough movement for filtration and heating.
For example, a 75-gallon reef often does well with 225 to 375 gallons per hour after head loss. Head loss matters. Pumps move less water as they push upward and through plumbing. Always check the pump curve before buying.
DC return pumps are popular because they are quiet and adjustable. AC pumps are often durable and simple. Either can work. Choose reliability first. Keep the pump easy to remove for cleaning. A dirty pump loses performance over time and may become noisy. For broader equipment planning, see: best reef aquarium equipment.
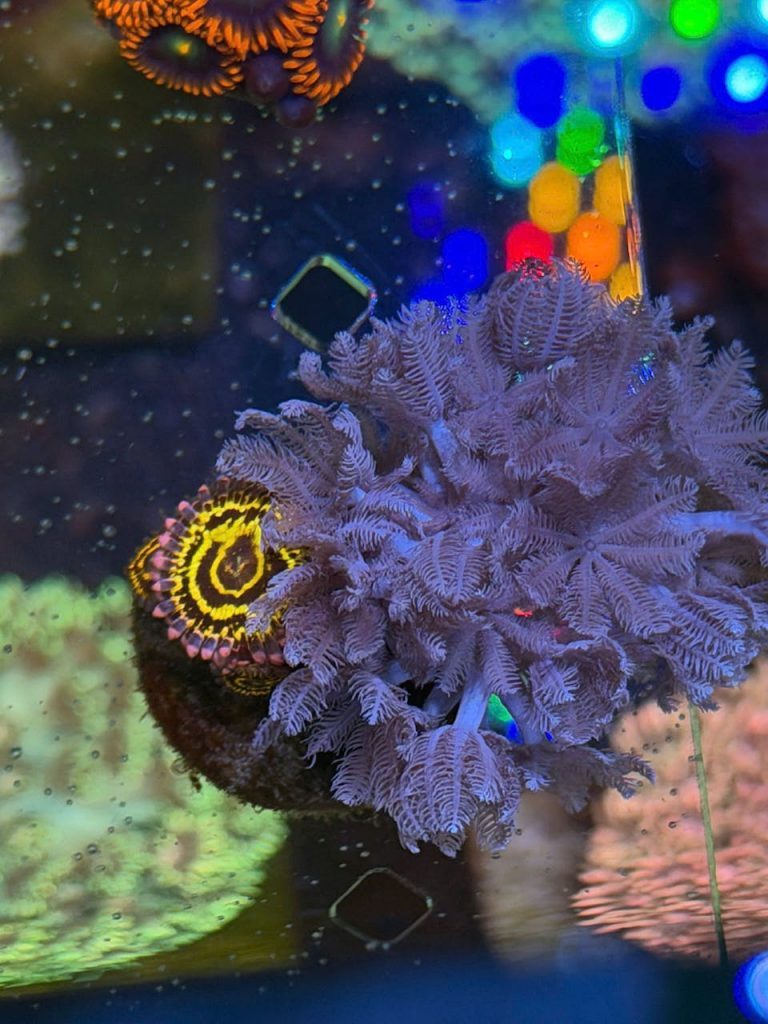
Skimmer, Refugium, and Media Placement
A protein skimmer works best in stable water depth. Many sumps include a dedicated skimmer chamber for this reason. If the water level changes too much, the skimmer becomes inconsistent. It may overflow or stop producing foam. Check the ideal depth in the skimmer manual.
A refugium is optional, but useful. It can grow chaetomorpha or other macroalgae to help consume nitrate and phosphate. It also creates habitat for copepods. Use moderate flow and a simple refugium light on a reverse schedule. This can help reduce nighttime pH drops.
Media reactors and bags usually go where flow is steady but not excessive. Carbon helps polish the water. GFO can reduce phosphate. Use both carefully. Fast changes in nutrients can stress corals. Test before making major adjustments. If you are managing nutrients, see: how to lower nitrate in a reef tank.
Auto Top Off and Water Level Control
An auto top off, or ATO, is one of the best sump upgrades. Evaporation removes freshwater, not salt. That means salinity rises as water evaporates. In a sump system, the return chamber shows this loss first. Without an ATO, the water level can swing daily. That creates unstable salinity and can stress livestock.
The ATO sensor belongs in the return section. The reservoir should hold enough freshwater for several days. Use RO/DI water only. Never top off with saltwater. That would slowly raise salinity even more.
Set the sensor away from splashing water and bubbles. False readings can cause overfilling. Test the system several times before trusting it unattended. Redundancy is helpful. Many hobbyists prefer an ATO with a backup sensor or timer limit. Stable salinity is one of the biggest long-term benefits of a well-designed sump.
Common Problems
Microbubbles in the Display
Microbubbles usually come from the skimmer, drain line, or return section. Check for splashing between chambers. Make sure baffles are working properly. Lowering the water drop between sections often helps. A skimmer that is breaking in can also release bubbles for several days.
Noisy Overflow or Gurgling
This often means too much air is entering the drain. Fine-tune the drain valve if you use a Herbie system. Reduce return pump speed if needed. Check for partial clogs in the drain line. Salt creep and snail shells can change flow over time.
Sump Water Level Fluctuates Too Much
The return section may be too small, or you may not have an ATO. Evaporation always shows there first. Adding an auto top off solves this in most systems. Also check for excessive fan use or dry room air, which increases evaporation.
Skimmer Performance Is Inconsistent
Unstable water depth is the first thing to check. Dirty air intakes can also reduce foam production. New additives, epoxy, and foods may temporarily change skimmer behavior. Clean the skimmer neck often and keep the chamber depth steady.
Flood Risk During Power Outage
This usually means the sump operating level is too high. Turn off the return pump and observe the rise. Adjust the normal fill line lower if needed. Keep return nozzles near the surface to limit back siphon. Drill anti-siphon holes if appropriate, but inspect them often.
Maintenance Tips for Long-Term Success
A sump needs regular cleaning to stay efficient. Replace or wash filter socks often. If they clog, water can bypass or overflow. Empty the skimmer cup before it gets too full. Clean the return pump every few months. Calcium buildup reduces performance and raises noise.
Vacuum detritus from dead spots in the sump. This waste breaks down and feeds algae. Trim macroalgae in the refugium so it keeps growing actively. Inspect plumbing connections for salt creep. Salt creep often points to a slow leak or spray.
Also test your backup plan. Simulate a power outage a few times each year. Confirm the sump still handles drain-down safely. Check that your ATO works correctly. Small maintenance habits prevent big problems later.
Frequently Asked Questions
Do all reef tanks need a sump?
No. Many successful reef tanks run without one. However, a sump gives you more water volume, cleaner equipment placement, and easier filtration options.
What is the best water level for a sump?
There is no single best level. The skimmer chamber should match the skimmer’s recommended depth. The total operating level must also leave room for backflow during pump shutdown.
Can I put the heater in the sump?
Yes. That is one of the best places for it. Put it in a chamber with steady flow so heat spreads evenly through the system.
How much flow should go through a reef sump?
Most systems do well with about 3 to 5 times display volume per hour after head loss. More is not always better.
Is a refugium necessary?
No. A refugium is helpful, but optional. Many reef tanks thrive with a skimmer, good flow, and regular maintenance alone.
A well-planned sump makes reef keeping easier. It improves stability, expands filtration options, and keeps the display clean. Start simple, test everything, and leave room for maintenance. Those basics matter more than fancy gear.
Was this helpful?
Related Posts
Beginner Reef Tank Guide
Learn how to build a beginner reef tank with the right equipment, stable water, easy corals, and simple…
Light Schedule Tips
Light Schedule Tips for a Happy Saltwater Aquarium Dialing in your light schedule is one of the most…