A reef tank microscope helps you identify pests, algae, and tiny life before guesswork leads to bad decisions. It is one of the most useful tools for coral dipping, disease checks, and tracking water quality issues in a reef aquarium.
Many reef problems look similar at first glance. Brown film, stringy slime, coral tissue loss, and moving specks can point to very different causes. A microscope gives you better answers. It helps you tell dinoflagellates from diatoms, inspect flatworms on corals, and confirm whether a frag plug is carrying hidden hitchhikers. In this guide, you will learn what type of microscope works best for reef tanks, what magnification you actually need, how to collect samples, and how to use the microscope to solve real aquarium problems.
Quick Reference Table
| Use Case | Best Tool | Ideal Magnification | Why It Helps |
|---|---|---|---|
| Identify dinos or diatoms | Compound microscope | 100x to 400x | Shows shape and movement clearly |
| Inspect coral pests | Digital microscope | 20x to 200x | Easy for frags, eggs, and nudibranchs |
| Check copepods and microfauna | Compound microscope | 40x to 100x | Lets you see body shape and motion |
| Inspect tissue damage | Digital microscope | 20x to 100x | Useful for coral skin and bite marks |
| General reef troubleshooting | Both types | Varies | Best coverage for common tank issues |
If you only buy one microscope, start with a basic compound microscope. It gives the best value for reef diagnosis. A digital microscope is still useful. It works well for inspecting corals, frag plugs, and fish lesions without making wet slides.
Why a Microscope Matters in Reef Keeping
Most reef keepers diagnose problems by appearance alone. That works sometimes. It also leads to many mistakes. Dinoflagellates often get treated like cyanobacteria. Harmless microfauna get blamed for coral decline. Flatworm bites can be confused with light stress. A microscope reduces that guesswork.
This matters because reef treatments are not gentle. Blackouts, chemical additives, antibiotics, and aggressive nutrient swings can harm corals. They can also destabilize the whole tank. If you can identify the problem first, your response becomes more targeted. That saves time and livestock.
A microscope also helps with prevention. You can inspect new frags before they enter the display. You can check dip water for pests. You can examine suspicious algae from the sand bed. Over time, this builds confidence. It also makes you a better observer of your reef system.
Types of Microscopes for Reef Tanks
There are two main microscope types that reef hobbyists use. The first is a compound microscope. The second is a digital microscope. Each has strengths. Each also has limits.
A compound microscope is best for wet samples on slides. It uses transmitted light from below. This makes it ideal for plankton, algae, and single-celled organisms. If you want to identify dinos, diatoms, ciliates, or copepod larvae, this is the better choice. Look for a model with 40x, 100x, and 400x magnification. You do not need 1000x for most reef work.
A digital microscope is easier for surface inspection. It is great for coral tissue, pest eggs, nudibranchs, and flatworms on frag plugs. It connects to a phone, tablet, or computer. This makes image capture simple. However, it is not as strong for identifying tiny suspended organisms in water.
Many hobbyists eventually use both. If your budget is limited, buy the compound microscope first. It solves more common reef mysteries.
What Features to Look For
You do not need a lab-grade microscope. You need a reliable one. Focus on practical features. Ignore inflated magnification claims.
For a compound microscope, choose a binocular or monocular model with LED lighting. Mechanical stage controls are very helpful. They let you move the slide precisely. Fine focus is also important. Tiny organisms drift in and out of view fast. Good focus control makes them easier to track.
For a digital microscope, choose one with adjustable stand height and decent lighting. Higher resolution helps. Stable mounting matters more. Handheld units shake too much for careful pest inspection.
You should also buy basic accessories. Get glass slides, cover slips, pipettes, tweezers, and a small sample container. A phone adapter can help with photos. Good images let you compare findings later. They also help when asking other reef keepers for a second opinion.
Step-by-Step: How to Collect Reef Tank Samples
Sample collection is simple, but technique matters. Bad samples lead to poor identification. Follow a consistent process each time.
- Turn off strong flow for a few minutes. This helps suspended material settle.
- Use a pipette to collect the material you want to inspect. Target film algae, slime, sand dust, or dip water.
- Place one drop on a clean slide. Add a little tank water if needed.
- Gently place a cover slip on top. Avoid trapping too many bubbles.
- Start at low magnification first. Use 40x or 100x before moving higher.
- Watch both shape and movement. Movement is often the key clue.
- Take photos or short video if possible. Compare them later.
If you are checking coral pests, inspect the coral first with a digital microscope. Then inspect the dip water under a compound microscope if needed. This two-step approach catches more problems. It also helps you see both adults and eggs.
Common Reef Tank Problems You Can Identify
A microscope is most useful when a reef tank starts acting strangely. Here are the issues hobbyists diagnose most often.
Dinoflagellates
Dinos often appear as brown snotty strings with trapped bubbles. Under a microscope, many species show clear movement. Some spin. Some dart. Some glide. Shape varies by species. This matters because treatment can vary too. Misidentifying dinos as diatoms is common. A microscope helps prevent that mistake.
Diatoms
Diatoms are usually less alarming. They often form a dusty brown coating on sand and rock. Under magnification, they show rigid geometric shapes. They do not move like dinos. In newer tanks, diatoms are normal. Seeing them under the microscope can save you from overreacting.
Cyanobacteria and Film Growth
Cyanobacteria can be trickier. It may appear as sheets or slimy mats. A microscope can help, but visual clues still matter. If the sample forms stringy mats and lacks the distinct shapes of diatoms or active movement of dinos, cyano becomes more likely.
Coral Pests
Acropora eating flatworms, red bugs, nudibranchs, and pest eggs are common reasons to own a microscope. You may not always identify every species instantly. Still, you can confirm whether tissue damage is caused by a living pest. That changes your next step completely.
Aquarium Setup for Microscope Use
You do not need a dedicated fish room lab. A small clean workspace is enough. Keep the microscope away from salt spray. Salt creep damages equipment over time. Set up a dry table near the tank, but not directly beside splashing water.
Store slides, pipettes, and sample cups in a small box. Label anything used for reef work only. Do not mix it with household cleaning tools. Good lighting helps when preparing slides. A white towel under the work area also helps you spot spills and tiny pests.
If you inspect corals often, keep a coral dip station nearby. That makes it easy to move from dip to microscope. Fast inspection improves your odds of seeing active pests. It also helps when checking stressed frags before they enter the display.
Propagation and Fragging Inspections
Checking Fresh Frags
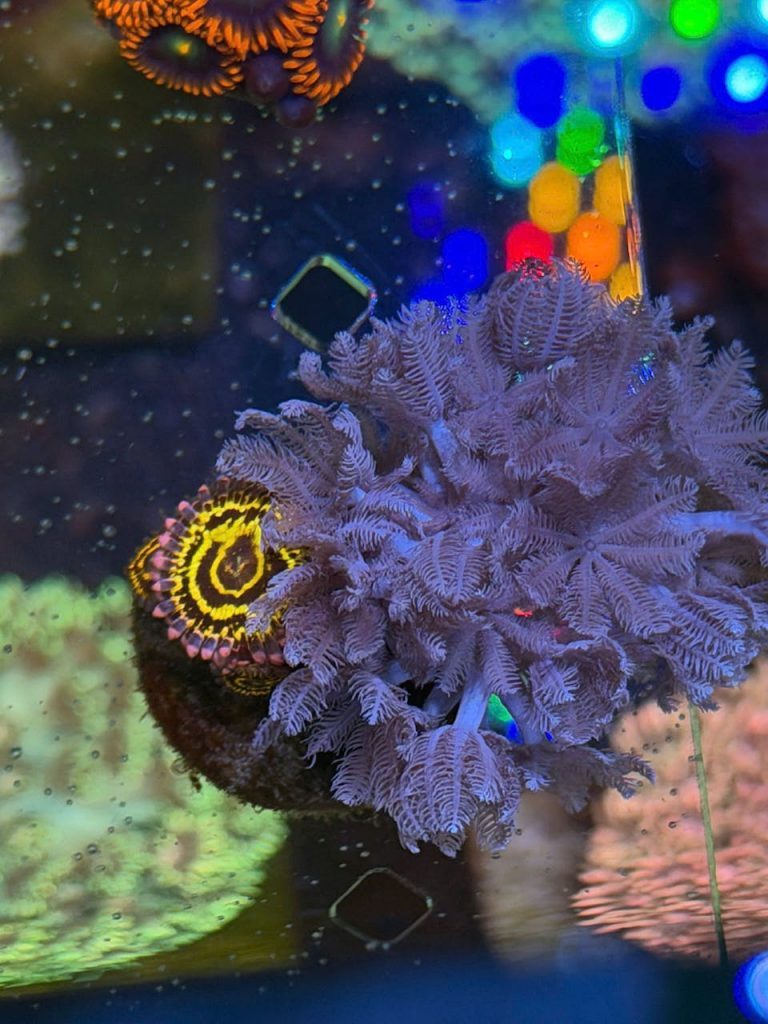
Freshly cut frags are vulnerable. They can also hide pests in folds, holes, and encrusted edges. A digital microscope helps you inspect the cut line, plug surface, and underside of the frag. This is especially useful for zoanthids, Acropora, and montipora.
Inspecting Dip Water
After dipping a coral, examine the dip water. Many pests detach but are hard to see with the naked eye. Flatworms, tiny crustaceans, and egg fragments may be visible under low or medium magnification. This helps you decide whether repeat dips are needed.
Tracking Healing
A microscope can also track healing over time. You can compare tissue edges, polyp extension, and suspicious marks across several days. This is useful when deciding whether a frag is recovering from shipping stress or still under pest pressure.
Common Problems
I cannot tell what I am seeing
Start lower. Many hobbyists zoom in too fast. Begin at 40x or 100x. Center the sample first. Then increase magnification. Look for overall shape, motion, and density. Take photos. Compare them side by side. Pattern recognition improves with practice.
The sample dries out too quickly
Use a fresh drop of tank water. Add the cover slip gently. Work faster once the slide is prepared. Strong room airflow can dry samples fast. This is common under bright lights or near fans. Prepare a second slide if needed.
Everything looks blurry
Clean the slide and lens first. Salt residue ruins clarity. Make sure the cover slip is flat. Too much sample thickness also causes blur. Use less material. Fine focus slowly. Tiny adjustments make a big difference at 400x.
I found pests after adding new coral
Remove the affected coral if possible. Dip it based on the suspected pest. Inspect the plug and base carefully. Repeat checks every few days. Many pests have egg stages that survive dips. Quarantine is still the best defense.
Frequently Asked Questions
What magnification do I need for a reef tank microscope?
For most reef tasks, 40x to 400x is enough. Lower power helps with pests. Mid power helps with algae and plankton. Very high magnification is rarely necessary.
Can I identify dinoflagellates with a cheap microscope?
Yes, often you can. A basic compound microscope with decent lighting usually works. You mainly need to see movement and body shape clearly.
Is a digital microscope enough on its own?
It is enough for coral inspection and visible pests. It is less useful for waterborne microorganisms. If you only buy one tool, a compound microscope is more versatile.
Can a microscope help with fish disease?
It can help inspect mucus, lesions, or external parasites in some cases. Still, fish disease diagnosis often needs observation, quarantine, and broader symptom review.
Should beginners own a microscope?
Yes, especially if they keep corals. It is not essential on day one. But it becomes very valuable once you start adding frags and troubleshooting nuisance growth.
Final Thoughts
A reef tank microscope is not just a gadget. It is a practical diagnostic tool. It helps you make better decisions and avoid random treatments. For many hobbyists, it becomes most valuable during the first serious tank problem. Once you use one, you will wonder how you managed without it.
If you want to build better reef habits, combine microscope use with quarantine, stable parameters, and careful observation. Those basics solve most problems faster. For more help, see our guides on reef tank parameters, coral dip guide, common reef tank pests, and how to quarantine corals.
Was this helpful?
Related Posts
Beginner Reef Tank Guide
Learn how to build a beginner reef tank with the right equipment, stable water, easy corals, and simple…
Light Schedule Tips
Light Schedule Tips for a Happy Saltwater Aquarium Dialing in your light schedule is one of the most…