

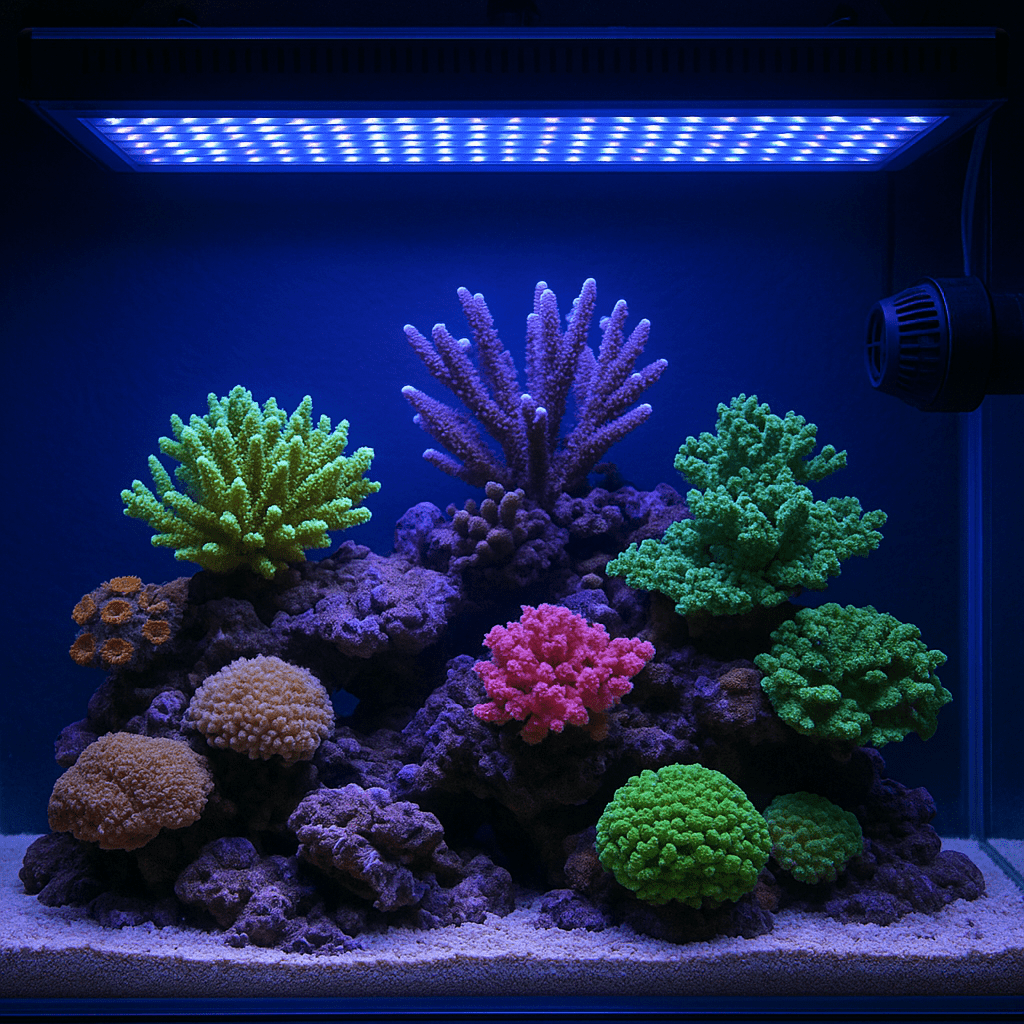
Coral fragging is the process of cutting or separating a coral into smaller pieces that can grow into new colonies. It helps reef keepers share corals, manage growth, and recover valuable pieces from damaged colonies. When done correctly, fragging is safe, practical, and one of the most useful skills in reef keeping.
Many hobbyists first hear about fragging when they visit a local frag swap or browse online coral vendors. Most of the corals for sale in the hobby are frags, not wild colonies. That matters because fragging supports aquacultured coral growth and reduces pressure on natural reefs. It also gives reef keepers a way to control aggressive corals, fill out a display tank, and trade healthy pieces with other hobbyists. In this guide, you will learn what coral fragging means, which corals are easiest to frag, what tools you need, and how to do it safely without harming your reef.
Quick Reference Table
| Topic | Key Information |
|---|---|
| What is fragging? | Cutting or separating coral into smaller pieces for regrowth. |
| Best beginner corals | Zoanthids, mushrooms, green star polyps, xenia, many branching SPS. |
| Common tools | Bone cutters, scalpel, coral saw, frag plugs, glue gel, iodine dip. |
| Best time to frag | When the coral is healthy, growing, and water parameters are stable. |
| Main risks | Infection, tissue damage, stress, poor healing, pest transfer. |
| Healing time | Usually several days to a few weeks, depending on the species. |
What Coral Fragging Means
A coral frag is a small piece taken from a larger parent colony. That piece is attached to a plug, rock, or tile and allowed to heal. Over time, it grows into a new colony. This is a form of asexual propagation. The new coral is genetically identical to the parent.
In reef aquariums, fragging serves several purposes. It helps prevent fast growers from taking over the tank. It lets you save part of a coral if the main colony declines. It also makes rare or expensive corals more accessible. Instead of buying a large colony, hobbyists can start with a smaller frag and grow it out.
Fragging is not limited to one coral type. Soft corals, LPS corals, and SPS corals can all be fragged. The method changes by coral structure. A branching birdsnest breaks differently than a fleshy mushroom coral. Knowing the coral’s anatomy is the first step to fragging it cleanly and safely.
Why Reef Keepers Frag Corals
Most hobbyists frag corals for growth control. Many popular corals spread faster than beginners expect. Green star polyps can cover rockwork quickly. Zoanthids can form dense mats. Branching SPS can shade nearby corals. Fragging keeps the aquascape balanced and prevents coral warfare.
Fragging also protects your investment. If a colony gets stung, falls, or develops tissue loss, a healthy frag may survive. Many experienced reef keepers keep backup frags of prized corals for this reason. It is a simple form of insurance.
Another reason is sustainability. Aquacultured frags are a major part of responsible reef keeping. They adapt well to aquarium life. They often ship better than wild colonies. They also reduce collection pressure on natural reefs. If you want to learn more about stable reef systems before growing corals, see reef tank cycling guide, reef tank water parameters, and beginner coral care guide.
Which Corals Are Easiest to Frag?
Soft corals are usually the easiest place to start. Mushrooms, zoanthids, xenia, kenya tree, and green star polyps are common beginner choices. These corals often heal quickly. They do not require heavy cutting tools. Many can be divided with a scalpel or scissors outside the tank.
Branching SPS corals are also straightforward once you gain confidence. Birdsnest, stylophora, and many Acropora species can be clipped with bone cutters. The cut is usually clean. Healing is often fast in stable systems with good flow and strong lighting.
Large polyp stony corals can be more challenging. Euphyllia can be fragged at the skeleton between heads. Acanthastrea can be cut with a saw if the skeleton allows it. Fleshy LPS need extra care because tissue tears easily. Avoid fragging stressed corals, freshly imported corals, or any specimen showing recession, bleaching, or pest issues.
Tools and Supplies You Need
You do not need a large coral lab to start fragging. A few basic tools will handle most beginner jobs. Bone cutters are useful for branching stony corals. A sharp scalpel works well for soft corals and zoanthids. Coral shears help with thicker tissue. A diamond band saw is helpful for advanced LPS work, but it is not required for most hobbyists.
You will also need frag plugs or small rubble pieces. Thick cyanoacrylate gel glue is the standard choice. Many reef keepers also keep reef-safe epoxy on hand for larger pieces. Iodine or coral dip can help reduce infection risk after cutting. Clean containers with tank water are essential for rinsing and handling frags.
Safety matters too. Wear gloves. Protective eyewear is smart. Some corals, especially zoanthids, may contain palytoxin. Never boil rocks or corals. Never frag in a poorly ventilated room. Keep tools clean and separate from kitchen items. Good habits reduce risk for both you and the coral.
Step-by-Step: How to Frag Coral
Start by choosing a healthy coral. Look for full extension, stable color, and active growth. Do not frag a coral that is already stressed. Prepare your tools before removing anything from the tank. Work quickly but gently.
- Turn off strong flow if needed.
- Remove the coral or isolate the section you will cut.
- Place it in a shallow container with tank water.
- Make one clean cut or separation.
- Rinse the frag in clean tank water.
- Dip if appropriate for the species.
- Dry the base lightly with a paper towel.
- Glue the frag to a plug or rubble.
- Hold it in place for several seconds.
- Return the frag to moderate flow and suitable light.
After fragging, place new frags in lower light than the parent colony if needed. This helps reduce stress. Increase light gradually over several days. Keep the frag stable. Avoid moving it repeatedly. Good flow helps remove mucus and supports healing. Stable alkalinity, calcium, magnesium, and salinity are critical during recovery.
Fragging Methods by Coral Type
Soft Corals
Soft corals are usually cut with a scalpel or scissors. Leather corals can be sliced into wedges. Mushrooms can be cut into halves or quarters. Zoanthid mats are often peeled from rock and trimmed into small groups of polyps. Because soft corals produce slime, good water quality and moderate flow are important after the cut.
Branching SPS
Use bone cutters to clip a healthy branch. Make the cut below the growing tip. Avoid crushing the skeleton. Glue the base to a plug and place it in strong but indirect flow. SPS frags usually prefer stable parameters more than any special treatment. Sudden swings are the main threat during healing.
LPS Corals
LPS methods depend on the skeleton. Euphyllia can be cut between heads at the branch. Chalices and acans may need a saw. Fleshy tissue should never be torn. Plan each cut around the skeleton first. Then protect the exposed edge with clean handling and low stress conditions. For more placement help, read coral placement guide and PAR requirements for corals.
Healing and Aftercare
Fresh frags need a calm recovery period. Place them where they will not be knocked over by snails, crabs, or strong fish activity. Moderate flow is ideal for many species. It keeps debris off the cut while avoiding tissue damage. Lighting should match the coral type, but new frags often do better with a short acclimation period.
Check the frag daily for signs of healing. Good signs include polyp extension, stable color, and tissue growth over the cut edge. Bad signs include brown jelly, tissue peeling, foul odor, or persistent shrinking. If a frag declines, inspect for pests, detritus buildup, or unstable chemistry.
Do not overreact to a few hours of stress. Many corals stay closed after handling. Give them time. Maintain consistency. Keep salinity stable. Avoid sudden alkalinity changes. Run carbon if the tank contains many soft corals releasing chemicals after cutting. In mixed reefs, this can reduce irritation to nearby corals.
Common Problems
Why is my frag not opening?
This is common after handling. The coral may simply be stressed. Check flow first. Too much direct flow can keep polyps closed. Next, review light intensity. New frags often need less light at first. Also inspect for glue touching living tissue. If water parameters are stable, give the frag a day or two before making more changes.
Why did the frag detach from the plug?
Usually the surface was too wet or slimy when glued. Dry the base briefly before applying glue gel. Use enough glue to form a firm mound. Hold the frag steady until the bond sets. Some soft corals do better in a small cup with rubble until they attach naturally.
Why is the tissue receding after fragging?
Tissue recession often points to stress, infection, or poor water quality. Test alkalinity, calcium, magnesium, nitrate, phosphate, and salinity. Inspect the cut for damaged tissue or pests. Improve flow around the frag. Consider an iodine dip if the species tolerates it. Remove dying tissue quickly if the problem spreads.
Can fragging spread pests?
Yes. Flatworms, nudibranchs, algae, and vermetid snails can hitchhike on frags and plugs. Dip corals before placing them in the display. Inspect the underside of plugs. Quarantine is even better. Fragging is a good time to remove old plugs and remount clean pieces on new bases.
Best Practices for Safe and Successful Fragging
Frag only healthy corals. Use clean tools every time. Make one deliberate cut instead of several rough ones. Match the fragging method to the coral’s structure. Keep handling time short. Return the coral to stable water quickly.
It also helps to keep notes. Record the date, species, and placement of each frag. This makes it easier to track healing and growth. Over time, you will learn which corals recover fast in your system and which need more caution. That experience is valuable. Fragging becomes much easier once you understand your tank’s patterns.
Finally, think long term. Fragging is not just a way to make more corals. It is a husbandry skill. It helps you manage space, preserve genetics, and build a more sustainable reef. Done carefully, it benefits both the hobbyist and the broader reef aquarium community.
Frequently Asked Questions
Does fragging hurt coral?
It causes stress, but healthy corals usually recover well. Clean cuts and stable water reduce risk.
How long does a coral frag take to heal?
Many frags settle within days. Full healing and visible growth often take several weeks.
Can beginners frag coral?
Yes. Start with easy soft corals or simple branching SPS. Avoid difficult fleshy LPS first.
What is the easiest coral to frag?
Green star polyps, xenia, kenya tree, mushrooms, and many zoanthids are beginner friendly choices.
Should I dip coral after fragging?
Often yes, but it depends on the species and the product used. Follow coral-specific guidance and avoid overly harsh dips.
Was this helpful?
Related Posts
Our Reef Emergency Plan
A reef emergency plan helps you act fast during outages, leaks, and water quality crashes. Here is the…
 By
ByReef Alkalinity and Calcium Guide
Learn the ideal reef alkalinity and calcium ranges, how they interact, and how to test, dose, and troubleshoot…
[favorite_button]
My Bookmarks:
To see full list click here
[user_favorites user_id="" include_links="true" site_id="" post_types="" include_thumbnails="true" thumbnail_size="thumbnail" include_excerpt="false"]