Coral quarantine sounds intimidating. It is simpler than most hobbyists think. A basic setup can prevent pests and reduce losses.
Why coral quarantine matters
Corals can carry hitchhikers. Many are hard to spot at first. A short quarantine helps you find them early.
Common pests include flatworms, nudibranchs, and vermetid snails. You may also see algae, aiptasia, or bryopsis. Eggs often survive dips and hatch later.
Quarantine also protects your display from parameter shock. New frags often come from different salinity and alkalinity. A slow, controlled transition prevents tissue loss.
Think of quarantine as an observation window. You can confirm polyp extension and growth. You can also check for recession at the base.
- Plan for 2–4 weeks of quarantine for most frags.
- Extend to 6 weeks if you suspect eggs or repeated pests.
- Log changes daily in a simple notebook or app.
If you want help with stability, review our reef tank water parameters guide. Stable numbers make quarantine easier. They also reduce false alarms.
Setting up a simple coral QT tank
A coral QT can be small and bare. A 10 to 20 gallon tank works well. Use a heater, small powerhead, and simple light.
Aim for display-like parameters. Keep salinity at 1.025 to 1.026. Keep temperature at 77–79°F. Keep alkalinity within 8–9 dKH if your display runs there.
Use a bare bottom for easy cleaning. Add frag racks and a few inert rocks if needed. Avoid live rock from unknown sources.
Filtration can be simple. A small HOB filter with floss works. Add a small bag of carbon after dips. Do not rely on a skimmer in tiny tanks.
- Match salinity within 0.001 specific gravity before transfer.
- Keep nitrate 5–15 ppm and phosphate 0.03–0.10 ppm.
- Change 10–20% water weekly to reset trace elements.
Light should be modest at first. Start at 30–50% of your display intensity. Increase over 7–10 days. This reduces bleaching from sudden PAR jumps.
Need a refresher on acclimation pacing? See our how to acclimate coral frags walkthrough. It pairs well with quarantine routines.
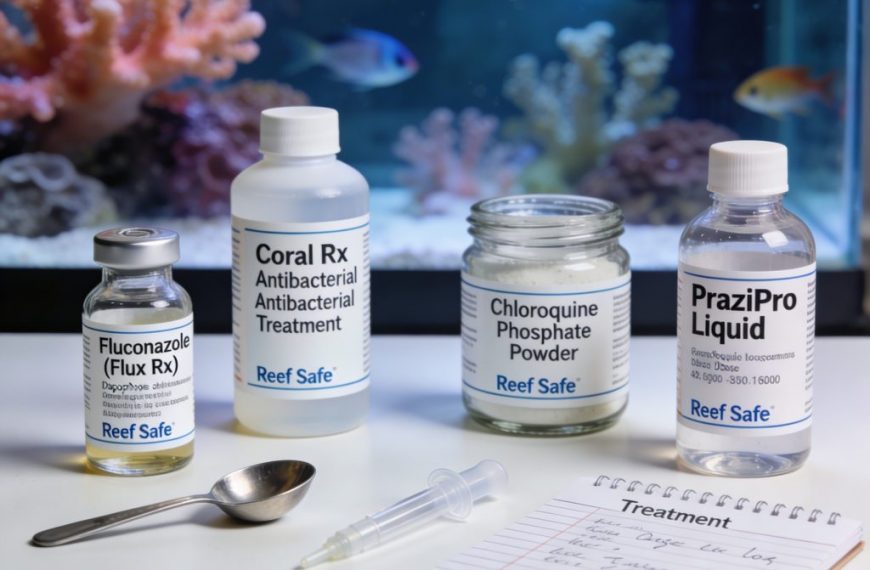
Dips, inspections, and a repeatable routine
Start with a careful visual inspection. Use a white container and a flashlight. Look under the frag plug and along the base.
Remove the frag from the original plug when possible. Many pests hide in plug holes. Re-mount on a new ceramic plug with cyanoacrylate gel.
Use a coral dip as a first pass. Follow the product label exactly. Many hobbyists dip for 5–10 minutes, then rinse in clean saltwater. Never pour dip water into QT.
Repeat dips can help with hatch cycles. Dip again at day 7 and day 14 if you saw pests. This timing targets many egg hatch windows.
- Inspect every 2–3 days for bite marks and missing tissue.
- Blast frags with a turkey baster to dislodge pests.
- Use a magnifier to spot eggs on shaded surfaces.
Troubleshooting is part of the process. If polyps stay closed for 48 hours, check alkalinity and temperature first. If tissue recedes, reduce light by 20% and increase flow slightly.
Watch for common mistakes. Do not mix new arrivals without inspection. Do not share tools between QT and display. Label nets, tweezers, and basters to avoid cross contamination.
When quarantine ends, transfer only the coral. Avoid moving QT water into the display. If you want a broader pest plan, read our reef tank pest control checklist.
Coral quarantine is a habit that pays off. It reduces pests, stress, and surprise losses. With a small tank and a steady routine, you protect your reef long term.
Sources: Borneman, E. (2001) Aquarium Corals; Delbeek, J.C. & Sprung, J. (1994–2005) The Reef Aquarium series; Paletta, M. (2008) The New Marine Aquarium.